Since you are going to be building all of your parts from raw materials, you will need to make some tooling. In a nutshell, these are devices which are going to help you make parts faster, more accurately, and of the proper shape. As I build my plane, I will add tooling to this page. Eventually, it will be possible to construct all of the tooling ahead of time by following directions on this page.
Shown below is the simplest tooling of all, a piece of paper! Many of the parts in the plans are drawn to full scale so that you can have a real template to make the parts out of. Below is an example of the 4130 steel wing attach brackets which will be welded to the tubular steel fuselage later on. This technique works equally well with aluminum, steel, wood, or fiberglass. The first step is to take your plans down to the local blueprint shop and ask them to copy the plan page that you are working on. Next, take the scissors to THE PHOTOCOPY and cut out the part which you intend to make. Glue the paper to some stiff cardboard, like the panel of a cereal box. Weigh them down of a flat surface while they dry to prevent warping. Once they are dry, you can trim them to the proper shape. Now you and use them as a template to trace shape of the finished part onto the raw material.
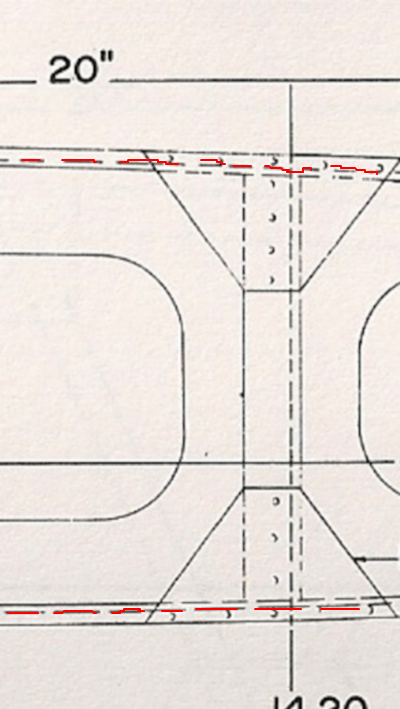
Wing Attach Brackets made from 0.125" 4130 Steel.
The templates are shown on top of finished parts.
Another area which benefits greatly from tooling are the wing ribs. You will be building 50 wing ribs............If that doesn't sound daunting, then I don't know what is! Can you imagine having to cut all of the plywood webs out one by one with a jigsaw? Not only is it tedious and time consuming, but each piece will come out different no matter how careful you are. Let me show you a better way. Remember the paper templates that we made for the wing attach brackets? Haul your plans back down to the blueprint shop and make two copies of page 508/509. Put one copy away for later when we build the rib assembly jig. Each wing rib has 3 webs: The nose, the main, and the tail. On page 508/509 you will need to cut the paper templates for each of the different components:
+ Main Nose Rib + Upper Tip Rib + Lower Tip Rib
+ Main Rib + Upper Tip Main Rib + Lower Tip Main Rib
+ Main Tail Rib + Upper Tip Tail Rib + Lower Tip Tail Rib
+ Station 2 Tail Rib + Station 8 Tail Rib + Station 14 Tail Rib
+ Aileron Tail Rib
Here's the important part..............You need to trim on the dashed line. The dashed line represents the outer edge of the plywood web which will become part of the rib. Cut all of your paper templates, then tape them to a sheet of 3/4" MDF. Don't use plywood, wafer board, or particle board. MDF is the only material that can be machined well enough to do what we are about to do.
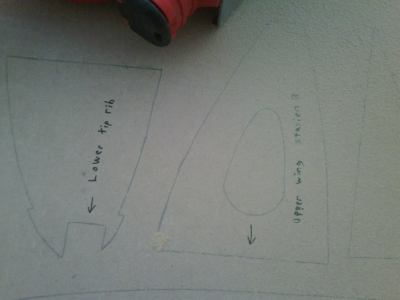
Here is the 3/4" MDF with the router blocks traced and ready to cut.
Trace all 13 of the templates onto the MDF material. Here is what mine looked like after I got done with tracing. I used a fine tipped Sharpie pen so that the cut line would be clear and sharp. Note the arrows which ALWAYS point to the front or leading edge of the wing.
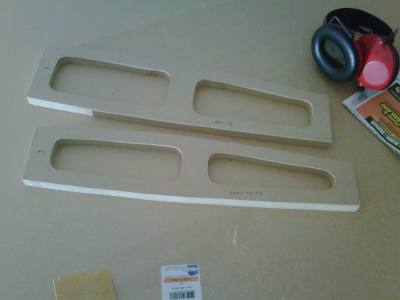
Router blocks which will be used to cut plywood webs which will be used in the wing ribs.
Using a reciprocating saw with a fine tooth blade, carefully cut out all 13 parts exactly to the lines that we just drew. If necessary, you can file and sand the edges if there are any saw marks. Remember, these are going to be the patterns for all of your rib webs! DO NOT round the edges or the corners.
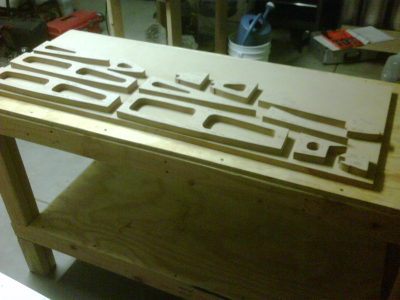
A big pile of router blocks.
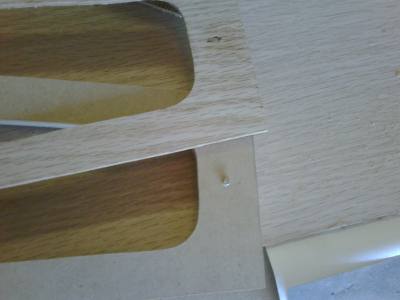
Get a sheet of cheap 1/8" plywood from your local plywood supplier or hobby shop. Don't use aircraft grade plywood for this step! Cut out pieces that are slightly larger than the MDF router blocks that you just made (see picture). Lay the plywood on top of the MDF and find a spot near each end. With a drill press and 1/8" bit, drill the first hole to a depth of 3/4" exactly. A drill stop works great for this.
Here you can see the tooling pins. The plywood blanks will fit the pins and be held in place while being routed.
Get some 1/8" steel rod from the hardware store and cut it up into 3/4" (26 of them) pieces and file them smooth. Drive the pin through the plywood hole into the MDF hole. This pins the ply into place, now drill the hole on the other end. Drive in the second pin. You may now separate the ply from the MDF.
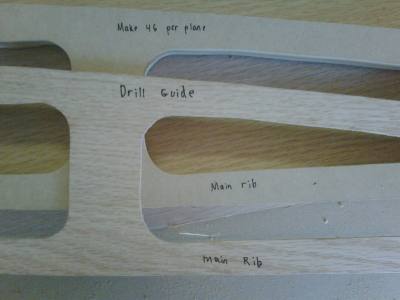
Here is a drill guide which will be used to drill tooling holes into the aircraft plywood. The drill guide was match drilled to the router block, then the drill guide itself was routed out. Note the quantity is called out on the block.
Here is what have............You have a drill guide and a router block. The drill guide will be used to drill tooling holes into aircraft grade plywood, which will mount on the router blocks. A router will be used to trim the parts to the final shape. Here you can see the two parts, ready to be mounted.
The final step is to glue the blocks to a piece of MDF. Be sure to leave enough separation between blocks so that A/C grade plywood pieces have space to lay down. Place the drill guides onto the pins and put the assembly away until you need it.
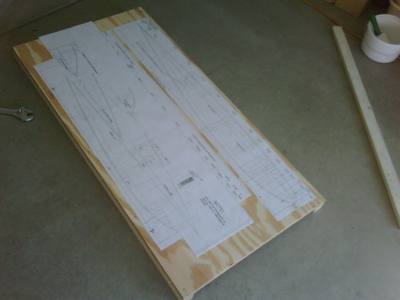
This wooden frame will become the rib assembly jig.
The next jig is the wing rib assembly jig. The first step is to make a board out of 3/4" plywood with some 2x2 lumber rails under the edges to keep the plywood straight and flat.
The finished rib router board.